Re-collimating a Binocular
The Problem
It is often the case, especially with budget binoculars, that they develop a double image. This is often due to a light impact causing one of the prisms to shift, although it can also occur because a more severe impact has caused one of the objective tubes to become dislodged.
The remedies can be simple:
- If the binocular is still under warranty, return it to the vendor.
- If the binocular is out of warranty and you want to have a go at fixing it yourself, read on.
The Solution
If it is clear that one of the objective tubes has become dislodged, simply unscrew it from the prism housing and carefully screw it back in, taking care not to cross-thread it.
If you are going to adjust a prism, the only tool you need is either a small flat-head ("jeweller's") screwdriver or, in rare cases, an Allen (aka "hex") key.
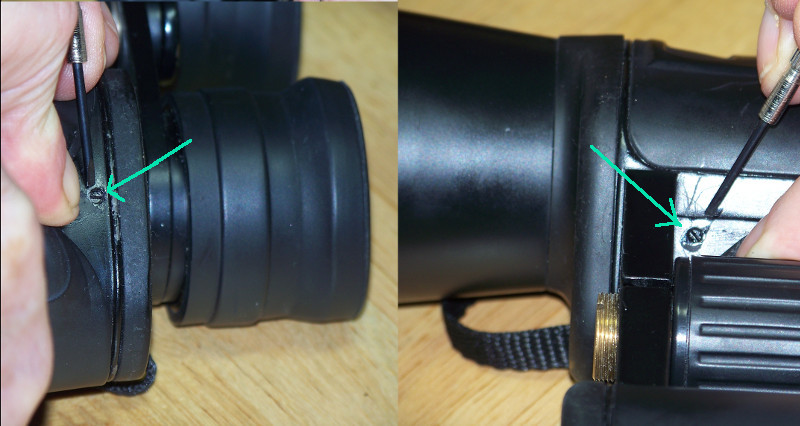
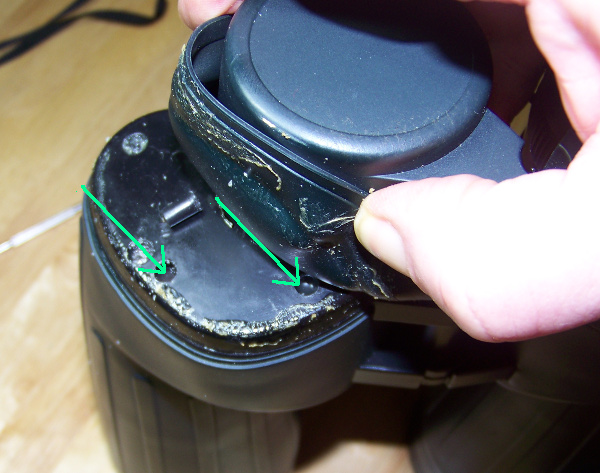
Locate the collimating screws. On most budget binoculars, these are grub-screws (a.k.a. "set-screws" if you are west of the Atlantic) that you will find under the armour surrounding the prism housing (in "leatherette" armour, there may be little "flaps" that cover the screws. On some binoculars, they may be under the prism housing cover plate, or under the armour covering that plate. In this case, the collimating screws are the ones that require a flat-head screwdriver. Those that require a cross-head screwdriver secure parts of the binocular together. They will be recessed, and the recess may be filled with adhesive (or, in the case of waterproof binoculars, a silicone plug) that you will need to prise out.
-
Mount the binocular, target it on Polaris (or another bright-ish star if Polaris is not available to you, but you will need to keep moving the binocular), and focus it. as best you can.
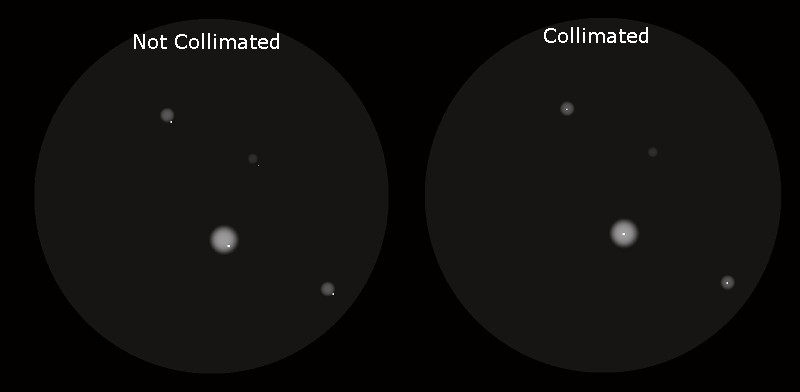
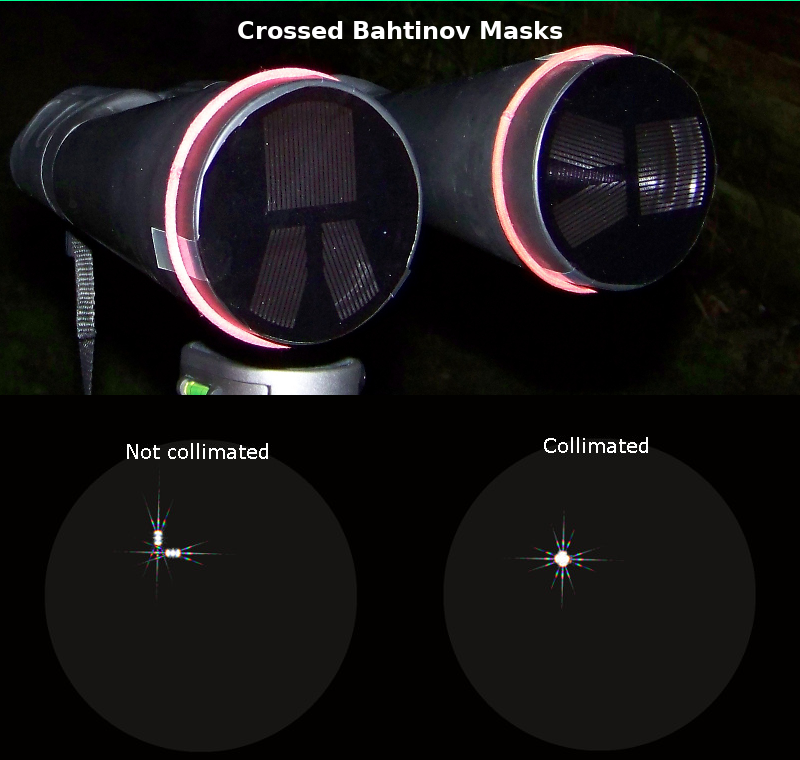
You need to fool your brain into believing that each eye is looking at a different object, or it will try to merge them; this can lead to eye strain and headaches. The simplest way to fool your brain is to defocus the right eyepiece, so the left side gives a point image of the star, whilst the other gives a blurry disc. Alternatively, you can use anaglyph 3-D spectacles (or different coloured cellophane sweet wrappers) so that each image appears a different colour, or print out a pair of Bahtinov masks on transparency film and place one on each objective at right angles to each other.
Ensuring the interpupillary distance is properly set for you, tweak the collimation screws, about an eighth of a turn at a time, until the focused star is in the middle of the defocussed blur, or the Bahtinov images merge.
If you need to, re-glue any removed rubber armour.
NB: I offer this advice in good faith, but you follow this description at your own risk. I cannot be held liable if you damage your binocular, yourself, or anything else, as a consequence of attempting procedures that I offer on this web site. In particular:
- We are assuming that your binocular is unusable as is, and if these methods fail, you may still have an unusable binocular.
- These methods do not result in full collimation, but in what is called "conditional alignment", i.e. that the images from each tube are merged only for the inter-pupillary distance (IPD) at which you set them.

